My Blog List

See Me Sew

Welcome to my little space! Let's share our things we cherish

Saturday, January 21, 2012

Things I made over Christmas 2011

I managed to make one ornament. I usually knit or crochet something for the tree. This year, I made one from a shared online freebie pattern:

IMG_4547

Pine cone! I love how it turned out. I would say it was easy, but it wasn’t! Oh, well. It also hurt my hands, making it with the thread and a small hook. I think it was a size 7 hook, and 10 cotton. This cotton was given to me by a nice customer, Gayle. Thanks!

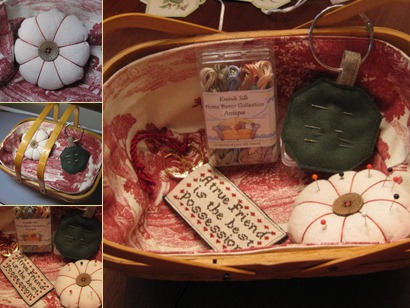
Then I made my friend a sewing basket. Well, I thrifted the basket. I wanted on that had handles so she could tote it around her house. We often do Friday sewing days, and she carries her sewing from the basement up to the kitchen. Everything was made from free online tutorials, etc,… However, I had a *bear* of a time with the basket liner, so it’s more of an “on my own” thing. I followed two tutorials, and they didn’t work for my shape of basket, so ended up taking little tucks in the sides and it fit just right. Third time was a charm! Whew!

What I Do in My Free Time

I learn something new! Upholstery class is my latest lesson. Yep, that’s what I do for fun and to save money (but lose blood)--I work on my own furniture. In typical fashion, I began my upholstering odyssey with THE hardest thing for even seasoned craftsmen to do: tufting.  And not just any tufting, but a tufted double ottoman with 18 buttons. sigh

Before I even show you the piece, let me tell you, this is one of the hardest things I’ve ever done. I have some arthritis setting in that I refuse to acknowledge, and removing hundreds of staples from this very well-made piece in order to “break it down” was killer on my hands. I also, at one point, sported 4 Band-Aids. Yes, there IS a reason why you usually see male upholsterers. And how much did my husband help? Well…he puts the ottoman in the car for me, if he’s home. He never took out one staple. He never even offered. Not that I blame him, but there *is* a husband in our class, helping his wife every single week.

Anyway, here is the ottoman “before,” while it has doggie hair and dirt on it and where you can see my Australian cattle dog bit some buttons off, back when he was a pup. What you can’t see from my photo is that this is forest green, burgundy and cream. I’m trying to do a more updated color. As the story continues, just about everything went wrong with finding my fabric!

IMG_4406

So, the fabric I chose was this (below) but you can’t tell it’s more of a light gold with, again, the green and burgundy:

IMG_4597

I LOVED this fabric and it was $15/yd from the discount place. Got 5 yards. Began breaking down my ottoman:

I don’t have photos of the stripped-down piece, but to continue my sad story, once I took it to class, we figured out the fabric wasn’t wide enough (ottoman is longer than 54” fabric width) AND the pattern ran in one direction, like wallpaper. That meant that if I “railroad” the pattern top to bottom all around like I’m supposed to, the pattern would be upside-down in the back. Now, for some people, that might work, if the piece goes up against a bed’s footboard or something. However, this is extra seating for my den, so it sorta needed to be correct.

Solution: use that fabric on my 2nd upholstery project, which is another really difficult piece, a chair with channeled back and piping!

By the way, each class is 3 hours, takes 4 classes and costs $195 total. Fabric was sort of purchased twice. I don’t think I’m saving much money, do you? LOL

I think a good part of why it’s hard is because I’m not that good at workshops. The course is done “round robin” style, which means you have to wait until the instructor comes back around to you for further instruction. I’m not very good at waiting. I’m always ready to move on. Anyway, here are some photos of the piece as I work on it. I have the welt cord (piping) on now, so the only remaining step is to replace the padding and stapling of the bottom. I cannot WAIT to finish. I do this on Sundays from 3-6PM, which I probably already said was a hard time of the day for me. I’m always tired by 5, and by 6 I’m pretty worthless! (which makes crock pot dinners great for me!)

And here are a few final photos of the class and my piece, which lacks only the very bottom.

Monday, January 16, 2012

Baby on My Doorstep!

One day in December, I came home from church to find this on my doorstep:

IMG_4689

A baby in a basket, with a Band-Aid on her eye! The note with her was from a dad, and it said I’d spoken with his wife about fixing his daughter’s doll.

Indeed, the girl’s mom had phoned me earlier to ask if I could fix her “Jackie.” Her daughter had accidentally poked the doll’s eyes in, and now she thought she looked a little scary. You be the judge:

IMG_4693

So I set about seeing what we had to work with here. First I had to remove the head to see how the eyes were set. I had already old my customer that I wasn’t sure I could do this repair, as I hadn’t set eyes in a vinyl head before. Have only set rocker eyes in antique (bisque) dolls, which is done with plaster. The customer was willing to let me give it a try, though. As I removed the head, this is what I found:

There was a cloth bag inside (see large photo above) with plastic pellets in it giving the doll some weight. I removed that and then removed the head from the neck piece. With a flashlight, I could see that the eyes were set into sturdy vinyl sockets. Now what to do? Cut them open and take out the eyes, fix and then re-pour plastic/vinyl/silicone?

After doing a little research, I discovered one technique used with dolls like this is to heat the eyes with a hair dryer, then pop them out from the front. Worth a try, and here is the result:

IMG_4711          IMG_4712

The eyes were set into a metal rim that rested inside a black plastic “socket.” The eyes were actually broken when the owner pushed them into the doll’s head. Tiny“rocker” notches sitting into holes in the black socket cup had been snapped off. No choice for me, then, but to re-set the eyes in a stationery position. No more rocking open and closed for her.

One eyes went back together all right, as it wasn’t as broken. But the other one would not stay *up* in position, and fell down into the socket cup. So I came up with the idea of propping it up with a fabric-and-epoxy composite:

IMG_4714        IMG_4713

I shredded this monk’s cloth to make my mixture, and then stuffed the socket cup and reassembled the eye. It worked!

Once I had both eyes fixed, after they dried a while I used the hair dryer to heat up the doll’s eye holes again. Then I popped them back into her head. After a little positioning (two attempts on one eye) Jackie was looking good! I put her pellet weights and stuffing back in, gave her a new string tether for her neck (the cloth body is tied on at the neck) and took stitches at her neck where I’d loosened the body. After washing and brightening her layette and outfit, she was ready to go home, not looking a bit scary. Mission accomplished!

 IMG_4770IMG_4771

Upholstery Update

Well, this class is HARD! I think a good part of why it’s hard is because I’m not that good at workshops. The course is done “round robin” style, which means you have to wait until the instructor comes back around to you for further instruction. I’m not very good at waiting. I’m always ready to move on. Anyway, here are some photos of the piece as I work on it. I have the welt cord (piping) on now, so the only remaining step is to replace the padding and stapling of the bottom. I cannot WAIT to finish. I do this on Sundays from 3-6PM, which I probably already said was a hard time of the day for me. I’m always tired by 5, and by 6 I’m pretty worthless! (which makes crock pot dinners great for me!)

Thursday, December 1, 2011

What is Melissa Doing in her Spare (haha) Time?

Why, taking her first ever (and maybe last ever!) upholstery class, of course! Yep, that’s what I do for fun and to save money (but lose blood) on my own furniture. In typical fashion, I began my upholstering odyssey with THE hardest thing for even seasoned craftsmen to do: tufting.  And not just any tufting, but a tufted double ottoman with 18 buttons. sigh

Before I even show you the piece, let me tell you, this is one of the hardest things I’ve ever done. I have some arthritis setting in that I refuse to acknowledge, and removing hundreds of staples from this very well-made piece in order to “break it down” was killer on my hands. I also, at one point, sported 4 Band-Aids. Yes, there IS a reason why you usually see male upholsterers. And how much did my husband help? Well…he puts the ottoman in the car for me, if he’s home. He never took out one staple. He never even offered. Not that I blame him, but there *is* a husband in our class, helping his wife every single week.

Anyway, here is the ottoman “before,” while it has doggie hair and dirt on it and where you can see my Australian cattle dog bit some buttons off, back when he was a pup. What you can’t see from my photo is that this is forest green, burgundy and cream. I’m trying to do a more updated color. As the story continues, just about everything went wrong with finding my fabric!

IMG_4406

So, the fabric I chose was this (below) but you can’t tell it’s more of a light gold with, again, the green and burgundy:

IMG_4597

I LOVED this fabric and it was $15/yd from the discount place. Got 5 yards. Began breaking down my ottoman:

I don’t have photos of the stripped-down piece, but to continue with my sad fabric saga, once I took it to class, we figured out it wasn’t wide enough (ottoman is longer than 54” fabric) AND the pattern ran in one direction, like wallpaper. That meant that if I “railroad” the pattern top to bottom all around like I’m supposed to, the pattern would be upside-down in the back. Now, for some people, that might work, if the piece goes up against a bed’s footboard or something. However, this is extra seating for my den, so it sorta needed to be correct.

Solution: use that fabric on my 2nd upholstery project, which is another really difficult piece, a chair with channeled back and piping!

I’ll post more photos later of my ottoman. Each class is 3 hours, takes 4 classes and costs $195 total. Fabric was sorta purchased twice. I don’t think I’m saving much money, do you? LOL

Oops! Bedspread Returns for More Repairs

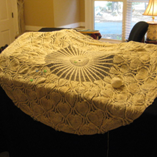
Well, I’m dreadfully embarrassed to say that one of my repair projects came back to me. My customer, Kay, was very understanding, though, and I do appreciate it. Kay’s crocheted bedspread had so much handwork in it that it is easy to see why areas would come loose and need work. After six or seven hours’ worth of putting things back together, however, I do believe that several other areas literally “came out in the wash.” My textile cleaner June does a great job, but though the spread was nice and white and looked great after its bath, it sure had many places that needed to be re-stitched. The spread is, however, so beautiful, and Kay says that her mother worked on it while pregnant with her. What a great piece to own! I know she sure is glad to have it all nice now. Here are more areas I worked on lately. The rest of this story is in an earlier post:

And here are a few more action shots of the bedspread repair. Kay marked spots with her safety pins, but I found a bunch more and marked them for her with orange thread that she can snip off once she receives the bedspread. Thanks for your patience and understanding, Kay!

Pineapple Crochet Project: a Tablecloth

Gayle K, a repeat customer, had a beautifully-worked round tablecloth in the familiar pineapple pattern. This pattern is really a lot of crochet chain, single, double and treble stitching. It’s just the sheer volume of work that makes it a long project. The pattern booklet Gayle sent with the project looked as if it came from the 1940’s. This is it in the photo to the left, I believe. I’ve already sent it back to Gayle. She also sent plenty of thread, and I used the ball that was attached:

tablecloth                IMG_4301

The pattern was pretty easy to follow. Took me a while to see where the original needle-worker had left off, and I definitely had to get to working on it before I realized how much time was involved in covering one round! The piece was probably about 70 inches already, but it wasn’t blocked. So just going the rounds I did on it pulled it out and then I did a lace finish on it. Here is how the tablecloth looked as received:

Very nice! And then the work began, and here are the first 2 (believe it or not) trips around:

IMG_4324IMG_4325

They don’t look like much but due to the pattern and large circumference took hours and hours! Each little circling of that hole you see at the hem is 24 double treble crochets all the way around (I think 22 of them) + the pineapple chains in between, x 2 rows!

So, for each double treble stitch (one row= 24x22 double trebles) here are the instructions:


  1. Yarn over hook three times, then insert hook into next stitch.
  2. Yarn over hook and draw yarn through stitch (there are five loops on the hook).
  3. Loop yarn over hook and draw through two loops (there are now four loops remaining on the hook).
  4. Yarn over hook and draw through two loops (there are now three loops remaining on the hook).
  5. Yarn over hook and draw through two loops (there are now two loops remaining on the hook).
  6. Again, loop yarn over hook and draw through the last two loops on the hook (there is now one loop remaining.)
  7. This completes one double treble crochet.

Double treble is a fun stitch that adds the needed fan appearance on top of each pineapple. But since adding whole pineapples at that point would’ve involved *far* too much time/hourly expense, Gayle and I opted for a nice finish that was a little lace border. Here is more of it, but then a final finishing row pulled the pineapple tips down a little more, which you see below in the last photos:

Once the hand work is done, it’s time to clean the piece. I enzyme-washed the cloth and then block stretched it to shape it. It dried overnight. I actually blocked it twice because after the first time, I was not happy with the level of lightening on some of the dark brown “rust” stains so I spot-treated them to get them lighter and lighter, carefully using various stain removing agents. If you attempt this at home, I would suggest you do your research first, as there are plenty of times I won’t clean an item and instead will refer people to a textile cleaner I know. Too much room for error, in my opinion.Below are the dark spotted areas. Overall, because the cloth was stored in plastic, there was a lot of yellowing that would come out in the wash:

And now for the finish! Here are the results! Nice and white-clean, and with a little border that looks feminine. It fits on a round 4-seater table or I’ve shown it on a little parlor table.